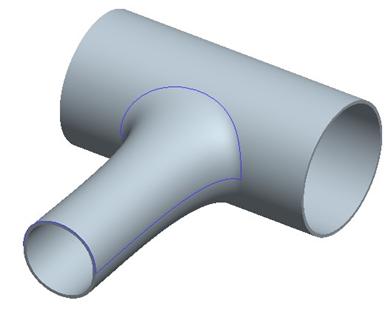
Lesson 9

Lesson Objective: In this lesson, we will take a really close look at the tangency line on the end of a curve and how to manipulate this line.

USE OF CURVE TANGENTS
When you create a curve, the endpoints contain an entity called a tangent line. This can be seen when you click on the endpoint, as shown below.
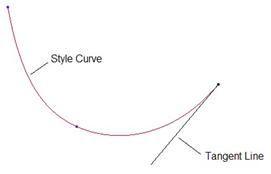
Often, when the end point is free, as it is in the above example, we can manipulate the length of the tangency line and the angle of the line with respect to the Horizontal direction of the active plane or viewing plane, as shown below.
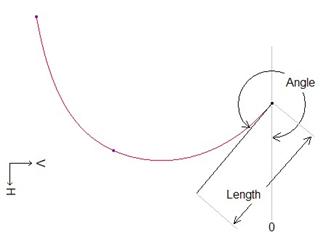
We will revisit modify these values a little later. The tangency line is used to determine the direction, tangency and/or curvature influence on the end of the curve. For example, if we wanted the end of a style curve to be normal to a particular datum plane, we would change the tangency line to be normal to that plane.
TANGENTS BETWEEN CURVES
When you have two curves that are connected, either through a soft point, or a fixed point, you can manipulate the tangency line as a function of surrounding geometry, or the other curve that it is connected to.
If you hold the right mouse button down over a tangency line, you will see the following options: Natural, Free, Fix Angle, Horizontal, Vertical, Normal, Align, Symmetric, Tangent, Curvature, Surface Tangent and Surface Curvature.
Surface Tangent and Surface Curvature will be discussed later in this lesson. For now, we will look at the rest of these options, which affect free or curve-to-curve connections.
Natural
When you create a style curve, there is already some sort of curvature coming into the endpoints. Suppose we sketched a curve with three points. The tangency line at the end of the curve is (by default) in its mathematical orientation, or its “Natural” orientation, as we can see below.
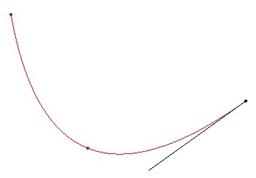
In the case of a two-point style curve (which is a straight line), the “Natural” direction is along the line itself, as we can see in the next figure.
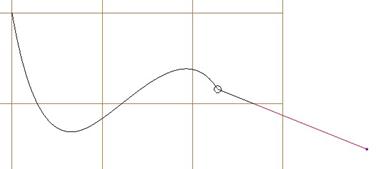
The style curve on the right is a two-point curve. The soft point at the upper left of this curve is currently selected, and the tangency line is running down the curve towards the free endpoint.
In the natural state, you can only modify the length of the tangency line. The angle is already determined mathematically.
Free
As soon as you start dragging a natural tangency line, it becomes free. At this point, you can modify the tangency line length and angle, as well as elevation. The following figure shows an example of a free tangency line for the two curves connected above.
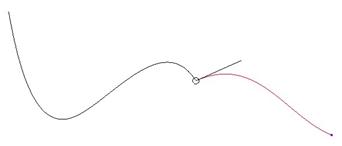
As you can tell from the previous figure, a free condition does not ensure tangency between the two curves. In fact, it is almost a guarantee that there will not be tangency.
Fix Angle
When you select this option, whatever angle you are currently at will become locked in, and you can only drag out the tangency length, as shown below.
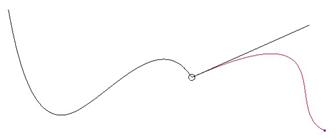
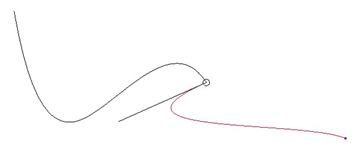
You do have the ability to drag the tangency line in the opposite direction (180 degrees from the current angle, which does not change the overall slope).
Horizontal
This is most commonly used when you have a planar curve, but it can be applied to a free curve based on your viewing orientation. When selected, the tangency line will only be able to move in the direction indicated by the horizontal vector on the active plane, as we can see below.
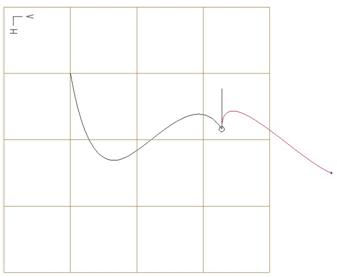
We can drag the tangency line in the opposite direction for this option as well.
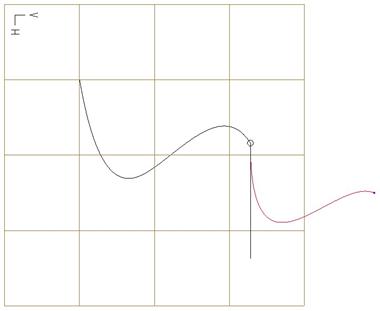
You can only change the length of the tangency line in this case.
Vertical
Similar to the “Horizontal” constraint, the vertical constraint forces the tangency line to go in the direction indicated by the Vertical vector on the active plane, as shown below.
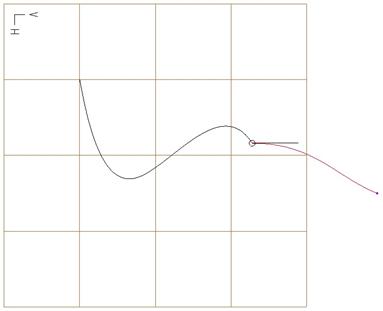
With this option, you can also drag the tangency line in the opposite direction, as shown at the top of the next page.
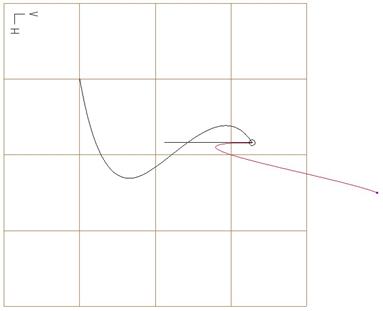
Tangency line length is the only value that can be modified.
Normal
We’ve seen this quite a bit in this training guide so far. This constraint allows you to pick a plane or planar surface to make the tangency line normal to. In the following example, we make the tangency line normal to the TOP datum plane.

Again, you can drag the direction to the opposite side.
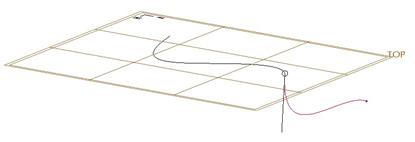
Length is the only value that can be modified.
Align
Align is used to take the tangent line direction and make it parallel to another endpoint’s tangency line. The other endpoint can be on a connected curve at the free end, or on a totally separate curve. In the following example, we make the tangency line at the soft point for one curve parallel to the tangency line at the free end of the other curve.
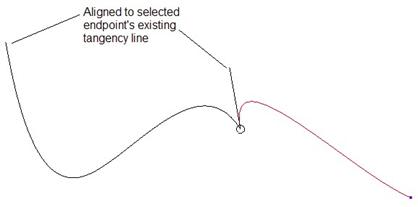
We can drag the tangency line to the opposite side, and it will still be parallel, as shown below.
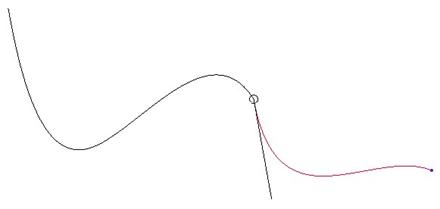
The length of the tangency line is the only value that can be modified.
Symmetric
The symmetric constraint is only a temporary command used to set the tangent lines of two adjoining curves to be the average of the individual tangent lines where they connect. If the selected endpoint is a soft point, as it is in our example, then the curve’s tangency is influenced by the other curve once the calculation is made.
This is shown in the figure at the top of the next page.
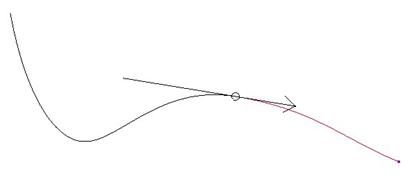
If you were to click on the end of the tangency line that does not have an arrow, it would flip the direction of influence from one curve to the other.
You can drag out the length for the follower curve only, but you can drag the length and angle for the leader curve.
Tangent
This is similar to symmetric, but the tangency line value of the leader curve is maintained, instead of the average of that tangency. We can see this in the following figure.
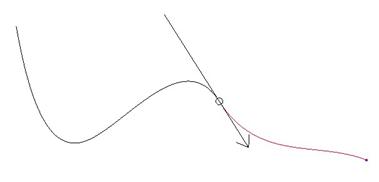
We can drag out the length for the follower curve only, but we can drag out the length and angle for the leader curve. The following figure shows a length modification for this existing leader/follower condition.
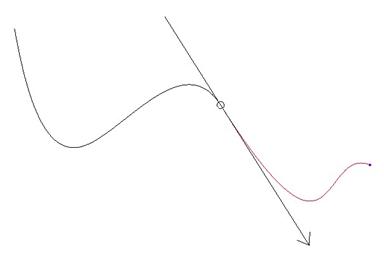
If we click on the end of the tangency line that does not have an arrow, it flips the direction of influence, thus making the previous leader curve a follower curve, as shown below.
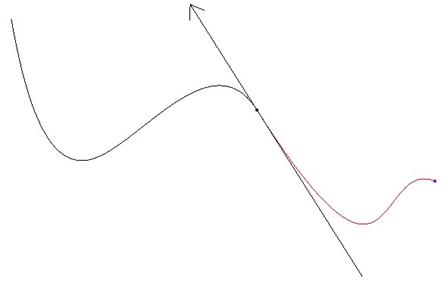
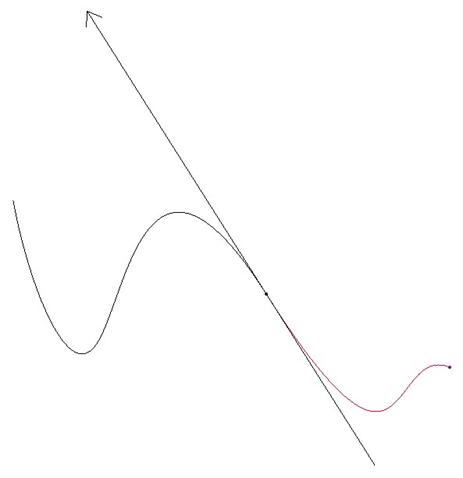
If we drag out the tangency line from the arrow side, we can see the length update, as shown below.
Curvature
The same rules apply for this constraint as tangent, but the curvature of the original curve (leader curve) is applied to the transition, as we can see in the figure below.
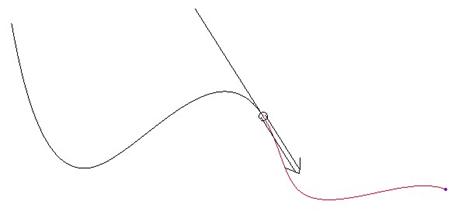
Note the double line on the arrow side? This is similar to what we saw in Lesson 5, when we talked about surface connections. This represents a G2 connection between curves, whereas the tangent condition by itself is only a G1. When no arrow appears on the tangency line, this is the equivalent of a matched or G0 condition.
If we drag out the arrow side of the tangency line, we can really see the influence of curvature from the other curve.
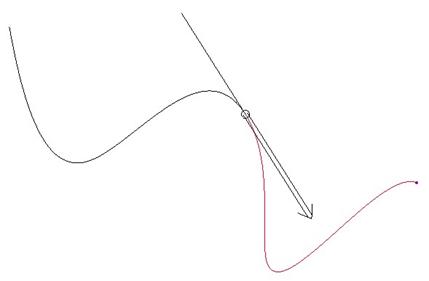
As with the tangency constraint, we can pick on the end of the line without the arrow to flip the direction of influence. This is shown at the top of the next page.
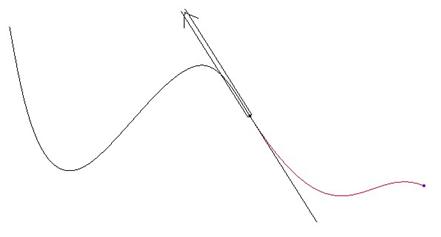
And, we can drag out the length for the arrow side, as shown below.
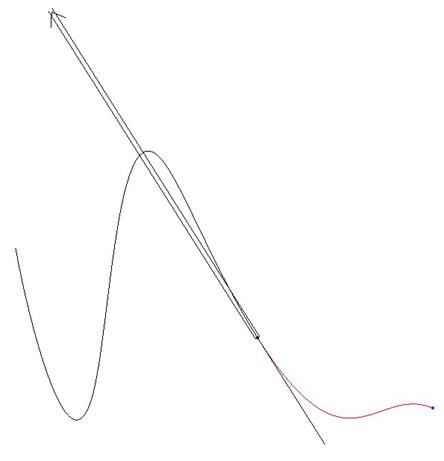
The follower side of this connection can only control length changes, while the leader side can affect length or angle values.
TANGENCY LENGTH/ANGLE/ELEVATION VALUES
With all of the tangency line connection types, we could change the length of the tangent line. The length determines how far away from the endpoint that condition will be applied. To demonstrate this, look at the following tangent connection between a straight curve (leader), and a curve with an arc to it (follower).
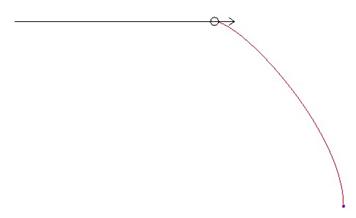
From this figure, we can see that the small length of the tangency line allows the follower curve to begin its arc early. If we were to increase the length of the tangency line, then it maintains the tangency to the straight line longer, giving us the following effect.
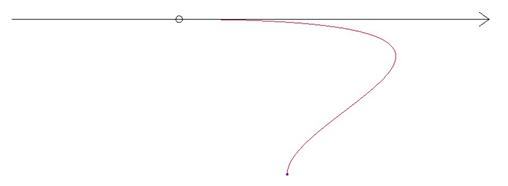
This is even more drastic when you look at the curvature condition for this same set of curves, as shown in the following two figures.
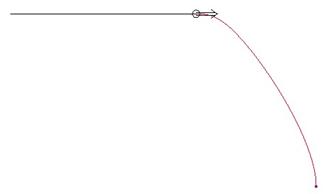
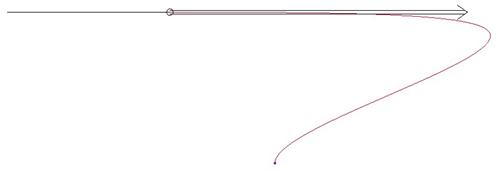
90 and 180-Degree Arcs
In style, you can create approximate 90 degree and 180-degree arcs if you adjust your tangency line length.
For a 180-degree arc, the length of the tangency line should be equal to the radius of the arc. Therefore, if we want to create a 180-degree arc with a radius of 5 inches, we would start with a line that has endpoints 10 inches apart, as shown below.

Next, we would change the tangency line conditions from Natural to Normal, and select a plane to make them go up as shown below.

Now, modify both tangent line lengths to be 5.0, and we can see our 180 degree arc.
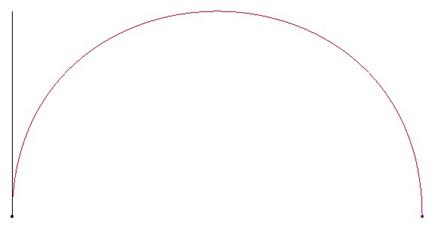
If you were to compare this with a 180 degree arc using a sketched datum curve, you would see that there is a difference. By adjusting control points or adding a midpoint, you may be able to adjust the curve to better approximate a 180 degree arc.
For a 90 degree arc, you must look at your curve as if you were bound by an octagon. Take a look at ¼ of the octagon with the radius inside to get a better understanding of the tangency line length.
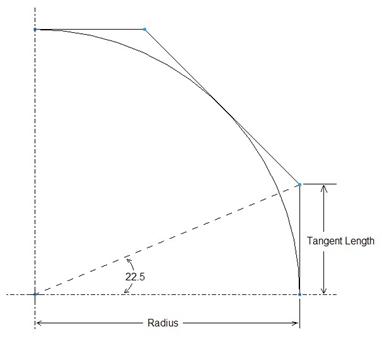
Your tangency line length would be the following:
Tan_length = Radius * tan(22.5)
In this example, it would give us a tangency length of approximately 2.071 for both tangencies.
To make a better approximation of a 180-degree arc, you could create it the way we did it before, then add a midpoint. Split the curve, and then adjust the tangency line lengths at all four endpoints to the equation value above (2.071 in our example), and your 180-degree arc would better fit the sketched datum curve.
SURFACE TANGENCY
There were two tangency line conditions we have not discussed yet. These are Surface Tangent and Surface Curvature. These are used when the endpoint of the curve lies on a surface or surface boundary curve.
To see this better, we will open up the model entitled Surf_Tan.prt. It will look like the figure at the top of the next page.
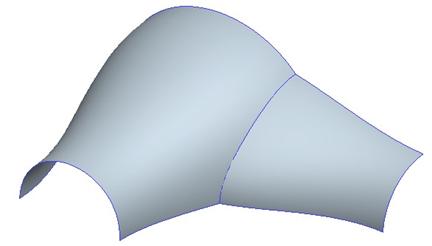
In the model tree, there are two separate style features. The only reason we have two is because we needed to trim part of the first style feature, and that needed a regular trim feature.
What we can see from the figure above is that we have a surface coming out of the first one. Right now, there is no tangency or curvature connection at the boundary of the two surfaces. You can see that there is a distinct crease where the two surfaces meet.
Our objective will be to make these two surfaces at least tangent to each other, if not share the same curvature.
Therefore, start by editing the definition for the second style feature. Once inside, go to a no hidden mode and then click on the edit curve tool.
Pick on the curve shown below, and then select the endpoint indicated.
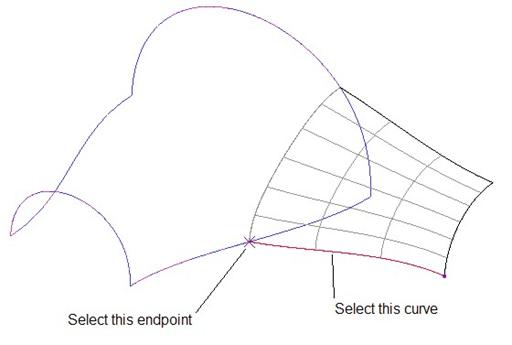
Once you select the endpoint, you will see the tangency line, as shown below.
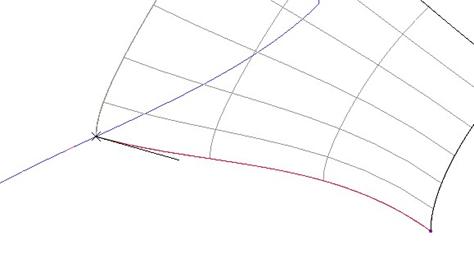
Hold down the right mouse button over this tangency line and select Surface Tangent. You will get the following result.
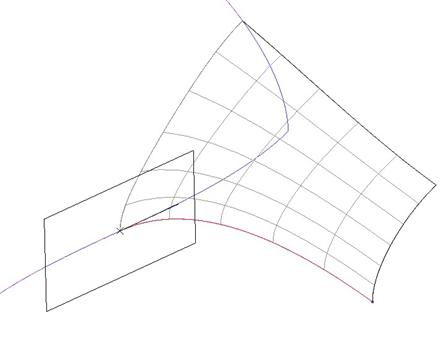
You will see the symbol for a surface tangent is a rectangle, versus an arrow that you have for a curve-to-curve tangency. In the Tangent slide-up panel, modify the length for the tangent to 3.5.
Then, rotate the model to see it from the back, and pick the top curve. Pick on the endpoint that is touching the existing surface, and you will see its tangency line, as shown at the top of the next page.
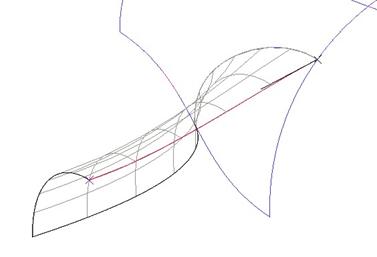
Right mouse click on this tangency line and select Surface Tangent also. You will see the surface tangency symbol appear again, as shown below.
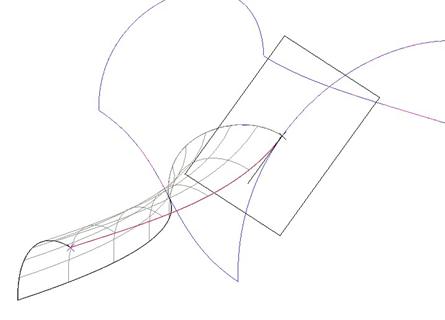
Change the length for this tangency condition to 3.0. Then click on the middle mouse button to finish edit curve mode. Our current model looks like the figure below.
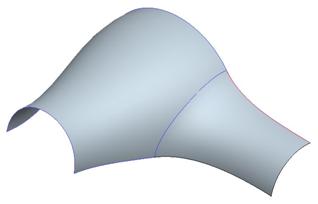
Now, we are going to pick on the connect surface tool (![]() ), select the two
surfaces, and then click with the middle mouse button. We should see that we
currently have a “Matched” condition between the two surfaces, as indicated by
the dashed line in the figure below.
), select the two
surfaces, and then click with the middle mouse button. We should see that we
currently have a “Matched” condition between the two surfaces, as indicated by
the dashed line in the figure below.
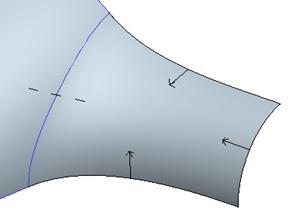
Click on the center of this dashed line, and you will see it turn into a tangent condition, as shown below.
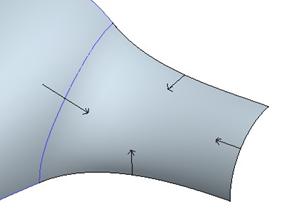
This eliminates the sharp crease between surfaces. Click on the middle mouse button to complete the surface connection. The model looks like the following at this time.
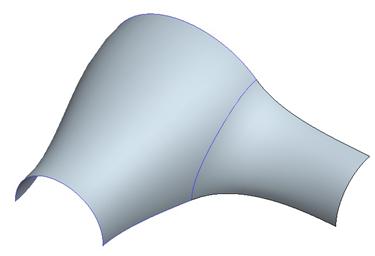
Now, we are going to switch these to surface curvature conditions. To do this, click on the curve edit tool again. Pick on the first curve and first endpoint as we had done before, and right mouse click on the tangency line and select Surface Curvature. This will make the curve tangent to the surface at its edge, and it will follow the curvature of the edge, as shown below.
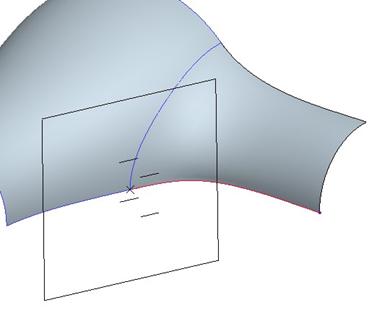
One of the obvious differences is the symbol used to report surface curvature. It has the rectangle like the surface tangency condition, but it has four tangency lines instead of one. You can pick on any one of these tangency lines to drag out the length.
Do this same process for the second curve. It will look like the following once you change it over to Surface Curvature.
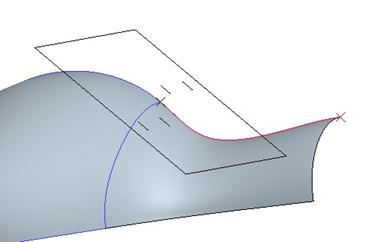
For both endpoints, change the tangency length to 2.0, and the surface will update as shown at the top of the next page.
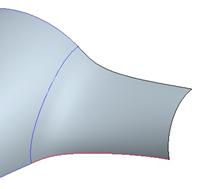
Now, click on the surface connect icon again, re-select both surfaces, and then click with the middle mouse button. We should still see the single arrow across the surface indicating tangency.
Click once on the middle of this arrow to change it from Tangency to Curvature, as shown below.
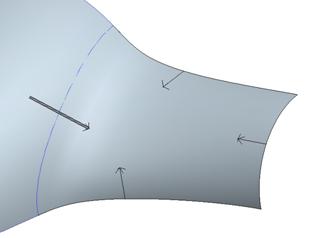
You can see the double arrow indicating Curvature. Click with the middle mouse button to finish this surface connection, and then click on the blue check mark to finish out of the style feature, which looks like the following.
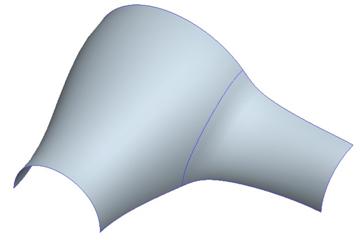
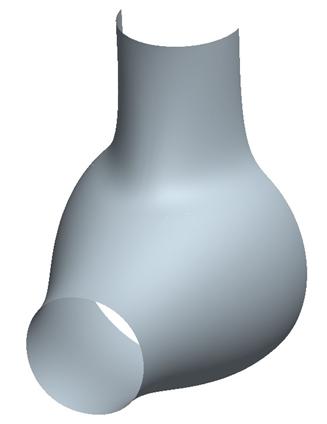
You can really see the affect of adjusting the surface tangency/curvature when you mirror this surface model.
SECONDARY CONSTRAINTS
When you use Surface Tangent or Surface Curvature you can sometimes specify a secondary constraint for the tangency line. For example, if you have a free style curve, and one of the endpoints is snapped to a surface. You can initially set the tangency condition to Surface Tangent. This still permits the tangency line to move around on the surface.
In the Tangent slide-up panel, we can see another drop down field at the top, called Second.

The following constraints are valid for the Second condition:
· Natural
· Free
· Fix Angle
· Horizontal
· Vertical
· Normal
· Align
These constraints behave exactly as described earlier in this lesson, except they are oriented on the tangent plane (the rectangle that appears on the constraint). If the existing curve already has some sort of constraint added to it, such as a planar curve, then the secondary constraint will not be available to select.
LESSON SUMMARY
To ensure a smooth transition between curves or surfaces, you will want to adjust the tangency line accordingly. You can choose from a variety of constraints that can be applied to the tangency line.
In conjunction with surface connections, you can create very refined surface boundaries to get a great looking model.
EXERCISE
Open up the model Lesson9.prt, which looks initially like the following figure.
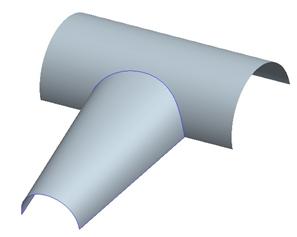
Use Surface Curvature or Surface Tangency to create the following completed style superfeature.
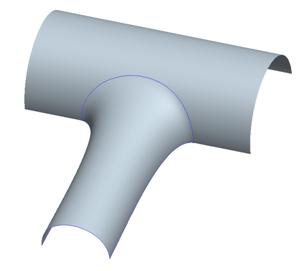
At the intersection of the style surface with the extruded cylindrical surface, use a tangency length of 1.0. Be sure that the style surface approaches the smaller end normal to that end.
Once you have this style feature complete, merge the two surfaces together, mirror the model about the TOP datum plane, and add a uniform wall thickness to the inside of 0.125. The completed model will look like the following.
