Lesson 29

Lesson Objective: In this lesson, we will learn about the Solidify Tool.

SOLIDIFY USAGE
The solidify tool is used to create a solid protrusion or cut by using a quilt surface. You would use this method to create a solid model from a set of closed surfaces that are completely merged together.
USING THE SOLIDIFY TOOL
The Solidify tool is located on the feature toolbar and looks like the following icon.
![]()
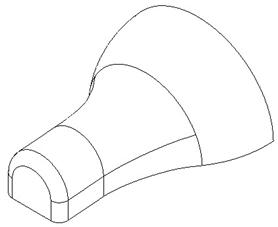
It will only become available when a quilt surface is selected. To demonstrate this tool, we will open up the Copy_Paste1 part that we worked on in Lesson 23. It currently looks like the following.

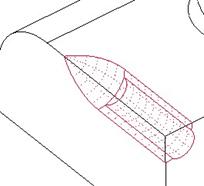
We will start by selecting Quilts in the selection filter, and pick on the surface feature on the model, as shown in the next figure.
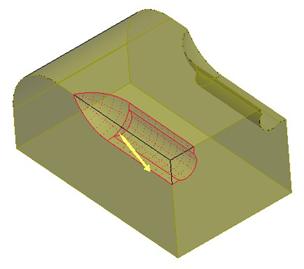
With our quilt selected, we will now pick on the Solidify tool in the feature toolbar. Our model will look like the following.
The dashboard for this tool looks like the following.
![]()
Across the bottom, from left to right, are the following icons:
· Create solid volume from quilt
· Remove material using quilt
· Create patch surface using quilt
· Flip side of quilt to create feature
Since our edges of our quilt lie on the solid volume surfaces, it automatically assumes we want to create a patch. We could use this if we wanted, and would end up with the correct model.
For demonstration purposes, however, we will pick on the “Remove Material” icon. When we do this, our preview looks like the following.
Since the shaded yellow volume represents what we will be left with, our arrow is obviously facing the wrong direction. Therefore, click on the yellow arrow or the “Flip” icon in the dashboard to point it in the opposite direction.
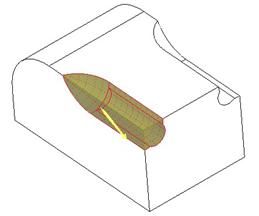
Our preview will now look like the following.

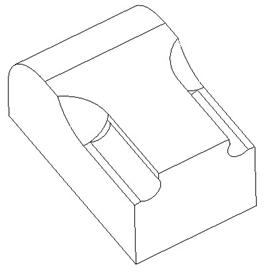
This is what we want, so we will click on the green check mark to complete our feature. The model now looks like the following.
Save and close this model.
LESSON SUMMARY
The solidify tool uses surface quilts to add, remove or replace solid volume.
EXERCISES
Open up the model BBS1. It looks like the following.

The middle of this part is a boundary blended surface that is open on the bottom. We will need to add a Fill surface (Lesson 24) to the bottom of this quilt, and then merge the two together (Lesson 25) to create a quilt that we can use for this operation. NOTE: Because our quilt completely touches solid volume on its sides, we will not have to copy the surfaces in between the solid features. It will work fine as long as the quilt does not touch air around the model.
The final model will look like the following.
Save and Close this model.