Appendix A

Appendix Summary: In this Appendix, we will see the solutions to all of the exercises for this training guide.
Lesson 1 _________________________________________________________ A-2
Lesson 2 _________________________________________________________ A-2
Lesson 3 _________________________________________________________ A-2
Lesson 4 _________________________________________________________ A-5
Lesson 5 _________________________________________________________ A-11
Lesson 6 _________________________________________________________ A-17
Lesson 7 _________________________________________________________ A-17
Lesson 8 _________________________________________________________ A-23
Lesson 9 _________________________________________________________ A-28
Lesson 10 _________________________________________________________ A-32
Lesson 11 _________________________________________________________ A-43
Lesson 12 _________________________________________________________ A-46

LESSON 1 – Designing With Style
There are no exercises for this lesson.
LESSON 2 – Overview Example
There are no exercises for this lesson.
LESSON 3 – Active Plane
Once we create the new part called Active_Plane, we will make sure our datum planes are visible, as shown below.
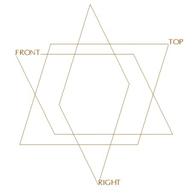
There are several ways we could capture an overall size of 10 x 5 inches, but the easiest is to use a sketched datum curve and create a rectangle with those dimensions. The sketching plane for this datum curve should be an offset datum plane 4 inches from the TOP datum plane, as specified in the exercise instructions.
Therefore, we will start by creating a new datum plane, and click on the TOP datum plane as our reference. Enter an offset value of 4.0 and our preview will look like the following.
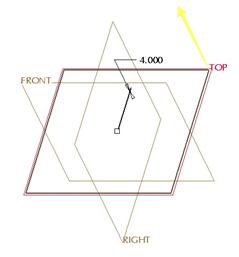
Click on OK to finish this datum plane. We will now have a DTM1 datum plane in our model. Now, we will create a sketched datum curve. For the sketching plane, use the DTM1 plane that we just created, and accept the default reference as the RIGHT datum plane, facing towards the Right.
Since we were not specifically told that the active plane had to be symmetric about the RIGHT and FRONT planes, we can sketch the rectangle in any of the quadrants. For this exercise solution, we will choose the upper right quadrant, and sketch our 10 x 5 inch rectangle, as shown below.

Once we are done with this sketch and we click on the blue check mark, we will see our new datum curve in the model, sitting on the DTM1 datum plane that we created earlier.
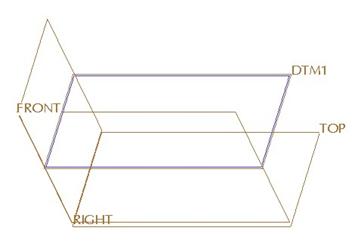
At this time, we will enter into a style feature by clicking on the following icon.
![]()
When we first enter into the style feature, we can see our default active plane sitting on the TOP datum plane, as shown in the following figure.
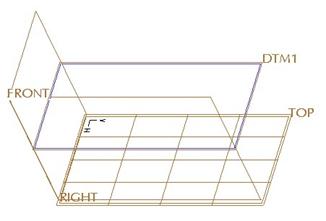
We will start by selecting the DTM1 plane as our new active plane using the following icon.
![]()
Once you pick on this icon, click on the DTM1 plane, and we should now see our active plane as follows.
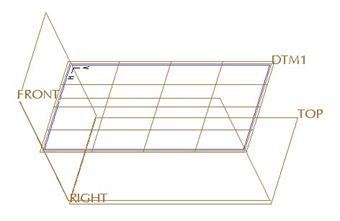
The next step is to adjust the spacing for our grid. We know that we need a ¼” spacing on the short side, which is currently 5 inches in length. Therefore, each block would need a grid pattern of 20x20, or a grid spacing of 21.
Therefore, we will go to Styling, Preferences, and change the grid spacing to 21, as shown below.

When we click on the Enter key after typing in this value, and then click on OK to exit out of the preferences window, we will see our new grid spacing, as shown at the top of the next page.
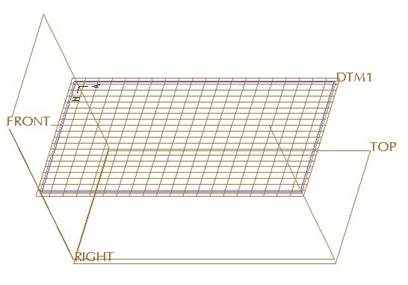
NOTE: Okay, if you look really closely, you will notice that the outline of our active plane does not lie exactly on the rectangular datum curve. So the question is – do we really have a ¼” spacing – probably not.
This is why I said that you should not rely on trying to get an exact dimensional spacing out of the grid.
LESSON 4 – Curve Basics
Open up the Transition.prt part file. Turn off datum plane display and go to a default view, and it will look like the following.

We will start by clicking on the style feature (![]() ) from the
feature toolbar. The active plane should be at the bottom of the two surfaces
(on the TOP datum plane), as shown at the top of the next page.
) from the
feature toolbar. The active plane should be at the bottom of the two surfaces
(on the TOP datum plane), as shown at the top of the next page.
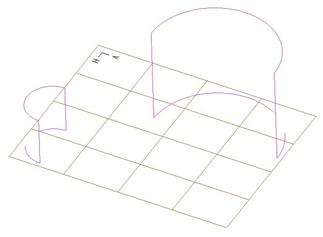
Start by clicking on the create curve icon (![]() ). Down in the
dashboard, change the option from Free to Planar so we create a
curve that lies on the active plane. Next, hold down the shift key to enable
snapping, and then pick on the first surface edge, followed by the second
surface edge in the places indicated below.
). Down in the
dashboard, change the option from Free to Planar so we create a
curve that lies on the active plane. Next, hold down the shift key to enable
snapping, and then pick on the first surface edge, followed by the second
surface edge in the places indicated below.
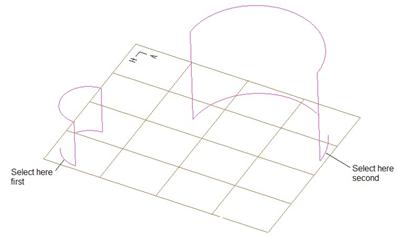
A Soft Point appears on both surfaces and a straight curve segment goes between them, as shown below.
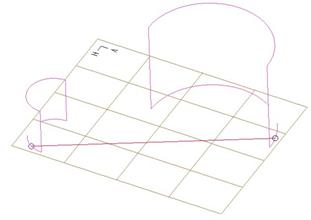
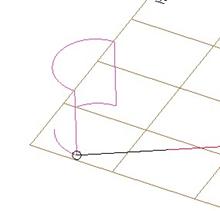
Now, click on the edit curve tool (![]() ) and drag the first endpoint to
the end of the surface (where it meets the vertical edge), as shown below.
) and drag the first endpoint to
the end of the surface (where it meets the vertical edge), as shown below.
Now, we will right mouse click on the tangency line (shown in the figure below), and select the Tangent option.

Selecting Tangent will give us the following.
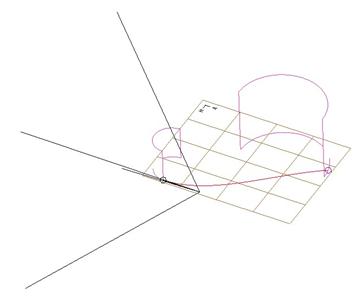
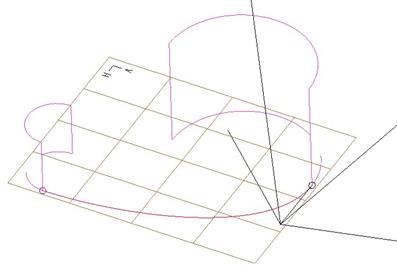
We can see that our curve now comes out smoothly from the surface, tangent to the rounded edge of the surface. The arrow shows the direction of influence. Now drag the other soft point to its vertex, and change its tangency line to be tangent as well. The result is shown below.
Now, click on the create curve icon again to start the next one. While we still have the Planar option selected in the dashboard, we will hold down the shift key, and select the next two locations, as shown in the following figure.
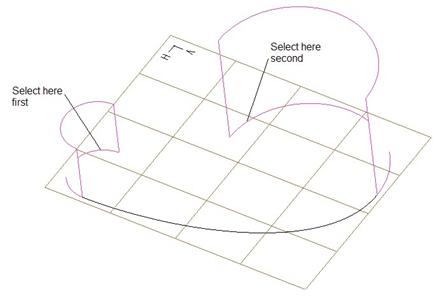
Doing this will create the style curve shown at the top of the next page.

Click on the edit curve tool, and drag these soft points over to their vertices, and change the tangency line conditions to Tangent for both ends. The resulting curve is shown below.

Click on the create curve tool once more, but this time, change the option in the dashboard back to Free. Next, hold down the shift key again, and select the two locations shown on the next page, creating our straight curve.

Switch over to the edit curve tool and drag the endpoints to the vertices, and set Tangent conditions at each end point. The curve will look like the following.
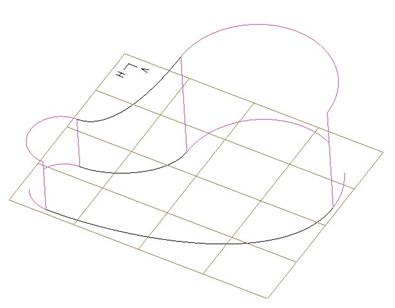
Finally, repeat this process to create one last free curve at the other two endpoints, making sure to start by picking (with the shift key) on the curved edges first, as shown at the top of the next page.
Then, add the necessary tangency conditions at each end point.

Once you have the final curve done, click on the blue check mark to complete the style feature. The completed model is shown below.
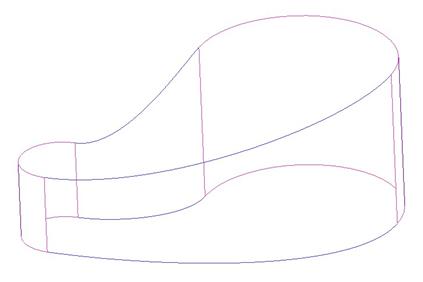
LESSON 5 – Surface Basics
Transition.prt
Open up the Transition.prt part file. It should look like the figure at the top of the next page. If it does not, please complete the exercise in Lesson 4 – Curve Basics.

Right mouse click on the style feature in the model
tree and select Edit Definition. Once inside the definition for the
style feature, click on the create surface tool (![]() ). We will begin by selecting the
four curves/edges shown below.
). We will begin by selecting the
four curves/edges shown below.
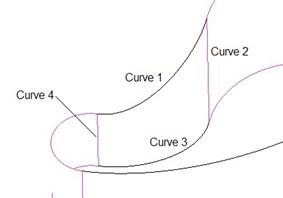
You will notice that you can select style curves or existing edges of surfaces or standard datum curves to be used as boundary curves. The two surface edges will appear in a bold red when selected, while the style curves will only highlight in red.
Once all four curves have been selected, you will see the following surface.
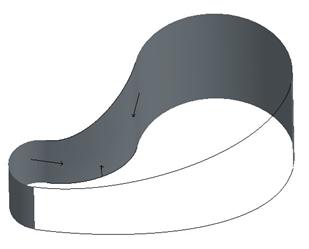
You will notice from the previous figure that we have a Normal condition imposed on the bottom curve, and a Tangent condition imposed from the two semi-circular surfaces. Click on the middle mouse button to accept this surface, as shown completed below.

Click on the create surface tool again, and pick the four curves/edges shown below.
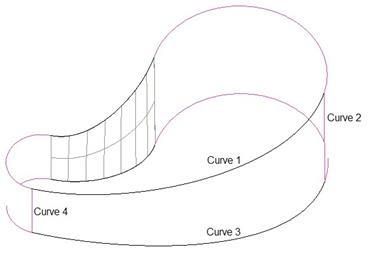
Once all four curves have been selected, we will see the preview of this surface, as shown in the following figure.

Click with the middle mouse button to finish this surface definition, and then click on the blue check mark to complete the style feature. Our final model looks like the figure below.
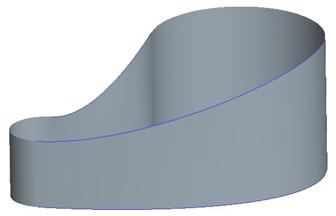
Save the model and close it.
Basic_Surf.prt
When you open this model, it will start of with the following.
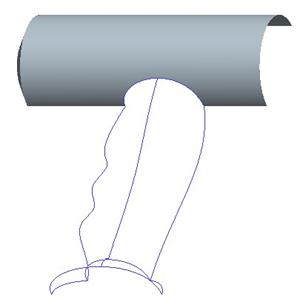
We are going to create two different style surfaces, each with an internal curve. Therefore, we will start by clicking on the style feature in the model tree and selecting Edit Definition.
Once inside the style feature, click on the create surface tool, and pick the four curves shown at the top of the next page as Curve 1 through Curve 4. Be sure to hold down the Ctrl key to select them.
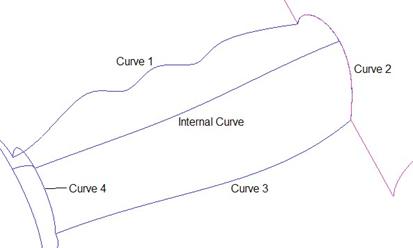
Once all four boundary curves are selected, you will see the following surface preview.

Now, we are going to go into the dashboard, and find the field for Internal Curves. Select on the black arrow and pick on the curve indicated as Internal Curve in the figure at the top of this page. Once selected, click on the middle mouse button, and the surface will update, as shown below.
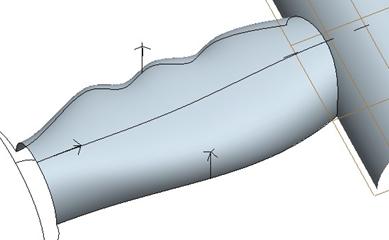
Click on the middle mouse button to finish out of this surface, and our style feature will currently look like the following.

Now, click on the create surface tool again, and select the four curves shown in the following figure as Curve 1 through Curve 4.
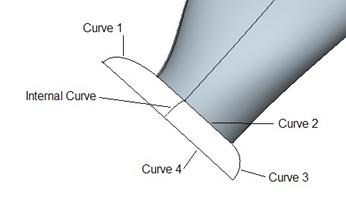
Then, click on the black arrow to select the internal curve shown above. Once selected, click with the middle mouse button to see the preview update, as shown below.
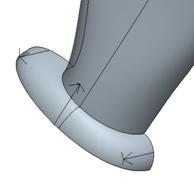
Click with the middle mouse button to finish this surface, and then click on the blue check mark to complete the style feature. Our finished model will look like the following.
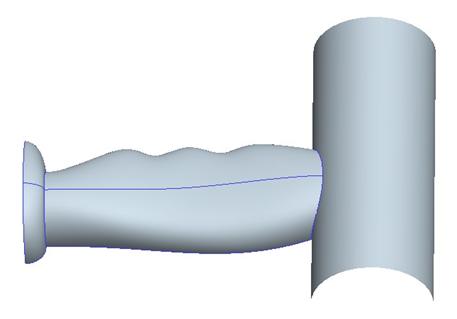
Save this model and close it.
LESSON 6 – Superfeatures
There are no exercises for this lesson.
LESSON 7 – Curve on Surface
Speaker.prt
Start by opening up the Speaker.prt part file. It will look like the following figure.
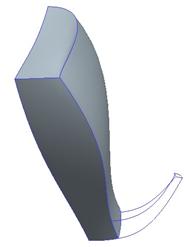
In the model tree, we can see that we are inserting after the style feature, and there are four additional features that are currently suppressed. We are going to begin by editing the definition of the existing style feature to add our Curve on Surface (COS).
Inside the definition for the style feature, click on the
create curve icon (![]() ). In the dashboard, make sure the
option COS is selected. What we want to do is outlined in the following
figure.
). In the dashboard, make sure the
option COS is selected. What we want to do is outlined in the following
figure.
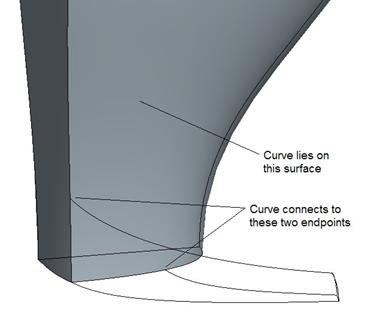
Based on this information, we are going to rotate the model so we can see it in the orientation above, and then pick on the surface indicated near the endpoints (but you do not have to be right on them – in fact it may be better to go away from them initially) as shown below.
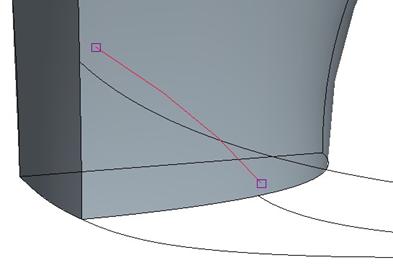
You can see in the previous figure that the curve actually
follows the contour of the surface between the two points we selected. Now, we
are going to click on the edit curve tool (![]() ) and drag the two endpoints of our
COS curve until they meet at the endpoints of the existing style curves. Be
sure to use the SHIFT key while dragging, and look for the little “x”
symbol to indicate that we’ve snapped to the endpoints of the existing curves,
as shown below.
) and drag the two endpoints of our
COS curve until they meet at the endpoints of the existing style curves. Be
sure to use the SHIFT key while dragging, and look for the little “x”
symbol to indicate that we’ve snapped to the endpoints of the existing curves,
as shown below.
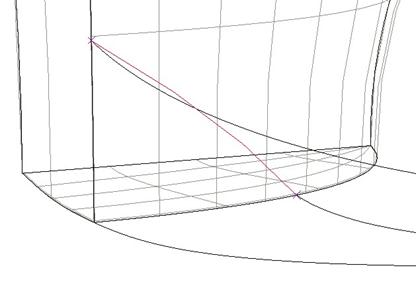
Now, go to a RIGHT view and we will make the final adjustments. We want to click on the endpoint that is at the bottom of the model, and force its tangency line to be NORMAL to the TOP datum plane.
Then, drag out the tangency lines at both ends until you get the approximate shape shown below.
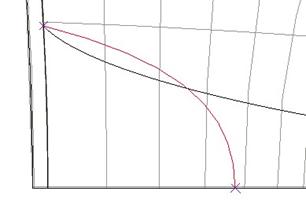
Click on the middle mouse button to finish this curve, and our preview looks like the figure at the top of the next page.
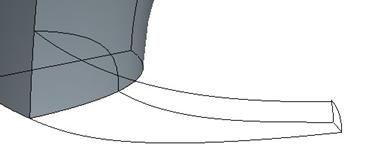
Click on the blue check mark to complete this style feature, which now looks like the following.
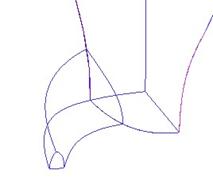
Now, create a brand new style feature by clicking on the following icon.
![]()
We are only going to create surfaces for this style feature. Begin by creating the four-sided surface at the back of this support arm, as shown below.
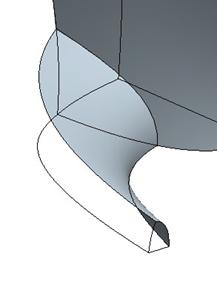
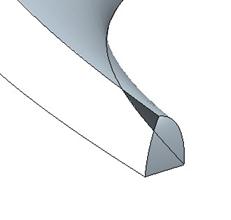
Click on the middle mouse button to finish this surface, and then click on the surface tool again to create the small three-sided surface at the end, shown at the top of the next page.
The third surface will be the flat four-sided bottom of this support arm, as shown below.

Finally, create the four-sided surface at the front of the support arm, as shown in the following figure.
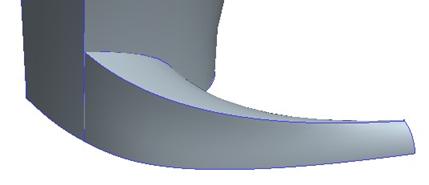
Click on the blue check mark once all four surfaces have been completed to finish the style feature. In your model tree, you should see two style features. Now we are going to merge them together to get the result shown at the top of the next page.
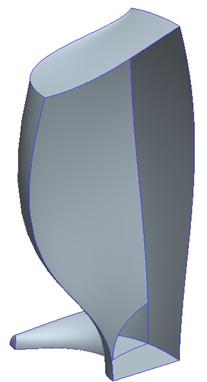
Finally, resume the rest of the features one-by-one. For the Mirror and Protrusion features, the original quilt has changed, so you will need to redefine them to select the new, overall quilt.
The final model should look like the following.
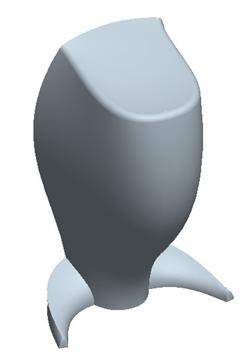
Amazingly, we were able to create this pretty complex model up to this point using only 14 features (including the seven default datum features). The style superfeatures contain a total of 25 individual style entities split up into two features.
Save and close the model.
LESSON 8 – Curve Control
Lesson8.prt
We will start by creating a new part called Lesson8. In the part, create a new style feature. Accept the active plane on the TOP datum plane.
For the first two curves, we are going to create planar curves on the current active plane. Therefore, go to a TOP view, and sketch the following curve. Use the Point slide-up panel to enter the exact X, Y, and Z coordinates for the points.
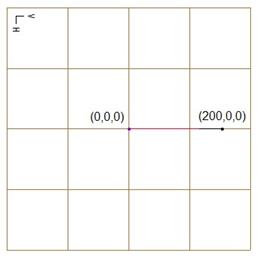
The second curve will be on the same active plane, and will have the following coordinates.
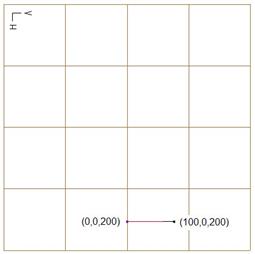
For the third curve, we are going to change the active plane to the RIGHT datum plane, and sketch the following curve.
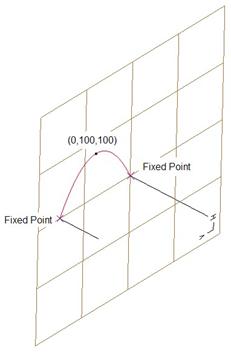
Remember to hold down the SHIFT key when selecting the first two curves. Add a midpoint, and change its location to the values shown above.
Our fourth curve will be a Free curve. Start by holding down the shift key and snap the curve to the end of the first curve. Click to locate the end, and then add a midpoint and modify the X, Y, and Z values for the two free points as follows.

The next curve will be a Free curve as well. It will have a soft point at the end of the shorter curve, and be connected to the longer curve at a Length Ratio of 0.5. Add a midpoint to this curve and locate it as follows.
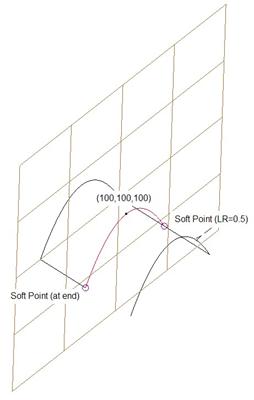
Now, before we can add our last curve, we will edit the fourth curve that we created. Split this curve at the midpoint, as shown below.
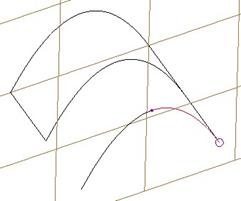
Then, create a Free curve that attaches to the end of this split curve, and at a Length Ratio of 0.5 at the far end (third curve that we created). This can be seen at the top of the next page.
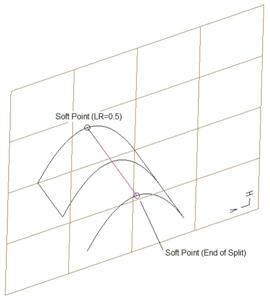
Now, select the left portion of the front curve and delete it, so we are left with the following.
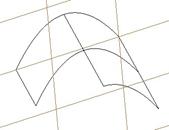
The last thing we need to do before we can create our surfaces is to make sure that the midpoint of the center curve lies on the last curve that we created. To do this, edit the curve, and drag the midpoint with the SHIFT key held down until it snaps to the straight curve. Check to make sure this soft point is at a Length Ratio of 0.5 on this curve.
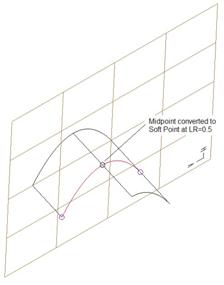
Now, we can create the two surfaces. Start with the smaller surface at the left of the model, as shown below.
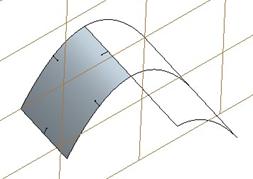
Next, create the other surface. When defining this surface, use the curve in the middle as an internal curve, as shown below.

Click on the blue check mark to complete this style superfeature, and your model will look like the following.
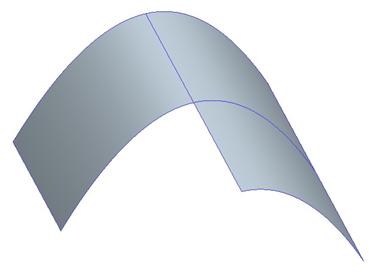
Save and close this part.
LESSON 9 – Curve Tangents
Open up the Lesson9 part file, which looks like the following.
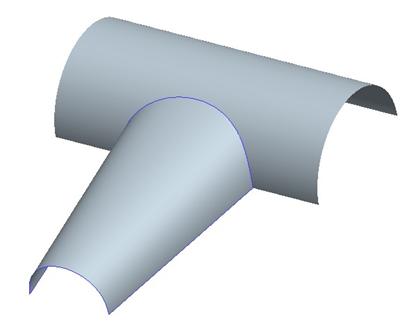
We will begin by editing the definition for the style feature. Once inside, activate the curve edit tool, and then select one of the side edges of the style surface (long, straight edge). Click on the endpoint that touches the cylindrical surface, and then right mouse click on the tangency line and select Surface Tangent. In the Tangent slide-up panel, enter a value of 1.0 for the tangency length. You will see the following.

Now, click on the other side edge, and do the same thing, which will result in the figure at the top of the next page.
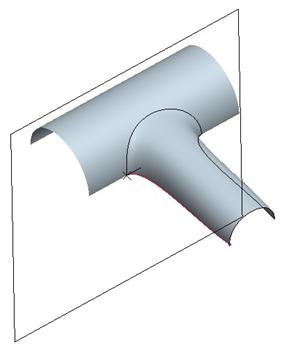
Now, go to a no hidden line view and pick on the tangency line at the opposite end of the same curve. Right mouse click on this tangency line and change it to Normal, and then select the FRONT datum plane, as shown below.

Repeat this for the other side. Once both sides are done, shade the model again, and click on the middle mouse button to complete the curve edits. Next, click on the surface connect tool, select the style surface and the cylindrical surface, and then click on the middle mouse button.
When the arrows appear, click on the two dashed arrows to change them to become solid, single arrows, as shown on the next page.

This will ensure that the style surface is tangent to the cylindrical surface along its entire boundary curve, and it will also ensure that it is normal to the smaller end of the surface. Click on the blue check mark to complete this style feature, which should look like the following.
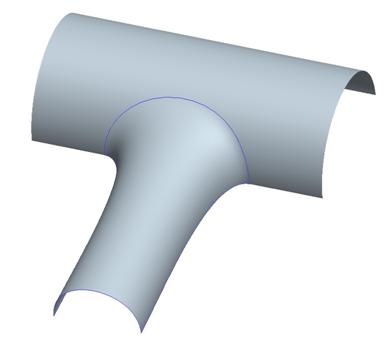
Next, merge the two surfaces together to get the following.
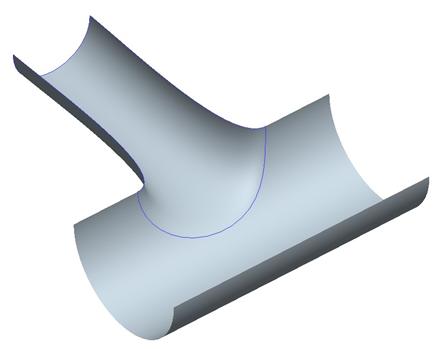
Mirror this entire surface model about the TOP datum plane, merge both sides, and then add thickness to the model using the thicken tool. Make sure the thickness is going to the inside with a value of 0.125. The completed model is shown below.

Save and close this model.
LESSON 10 – Curve Operations
There are actually a lot of steps to take when importing curves into Style. Mostly, this is because the curves are not perfect, and style makes no automatic assumptions as to their connectivity.
To save some time and space in this solutions guide, we will go through a higher-level of detail for the solution.
When we open up the Bowl model, start by blanking the Inner_Surfaces layer. When we do this, all we see are the curves that make up the outer portion of the bowl, as shown below.
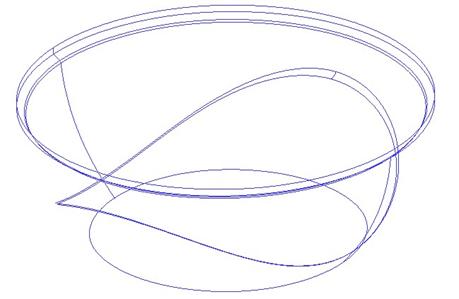
Create a new style feature. Start the new style feature by going to Styling, Curve from Datum from the menu bar. Then, select only half of the curves on the model, making sure you zoom in to get the very small curves that lie on the “mid plane”, as shown below.

After you have all of these curves selected (using the Ctrl key), click on the middle mouse button. You should notice that the regeneration tool icon in the system toolbar has a red light. This means that there is a problem with the style feature. Click on this icon to see the following resolve window.

In the upper portion of this window, we can see two items listed. If we highlight the first one (as shown above), we should see this object highlight on the screen. In this case, it is a very small curve that lies on the mid-plane of the part. In the lower portion of the screen, we can see an explanation of failure. It tells us that we have two curve points that are very close, and are considered to be at the same location.
If we zoom in close on this curve, we can see that there are two sets of points that have adjacent points very close to them, as shown below.

In the resolve window, there is an icon that looks like a pencil. This is the re-define option. We are going to select this, and then we are going to hold our right mouse button over two of the points shown above and delete them. We obviously want to keep the one that lies on the intersection of the other curves, so we will delete the one to the left of that.
Next, delete the one to the left of the one we just deleted, leaving the two outside ones in the previous figure. The result of this curve will be the following.

Now, click on the regenerate tool again, and we can see that there is only one curve left to fix (CF-83 in my example). This one will have two points on the left side that we need to delete. We want to keep the point that lies on the intersection of the other curves, but delete the immediate two to the right of this one. The result is shown below.

When we click on the regenerate icon again, it turns green and all of our failures are now fixed. The import of curves is complete. Click on the blue check mark to complete the style feature. In the model tree, right click on the Import Feature and hide it. We will only see the curves that are part of our style feature, as shown at the top of the next page.

Now, we have some cleanup that needs to happen. When you import curves, none of the endpoints of the curves are automatically snapped to their surrounding geometry. In addition, we may have some curves that should be combined to form a single curve.
We are going to start with four curves that need to be combined into two curves. Therefore, edit the definition of the existing style feature, and then click on the curve edit tool. Pick on the curve shown below.
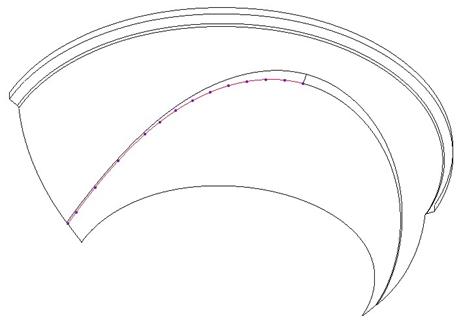
As you can see from the previous image, this curve ends at the short curve on the right side. We want this curve to continue to the right. We can also see that the right-most point on this curve is a free point (no fixed or soft point present). This means that it is technically not touching the curve that we want to combine it with.
Therefore, the first thing we need to do is hold down the shift key and drag the endpoint of this selected curve over until we see a soft point on the curve next to it, as shown below.

Then, release the shift key and drag this soft point back to the left end of the curve where it will automatically stop, as shown below.
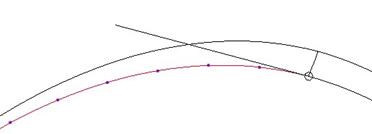
Next, hold down the Ctrl key and select the curve next to the one that we already selected so they both become highlighted, as shown below.

Right mouse click on the curve point that in the middle where the two curves meet, and select Combine. We are left with a single curve. Repeat this combine process for the two curves that are just above the ones that we finished combining, as shown at the top of the next page.
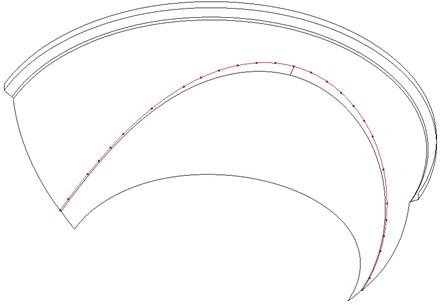
The next step is to address the short curve between the two combined curves, as shown below.
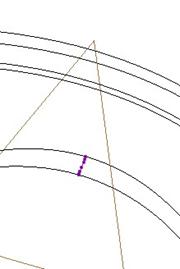
This curve lies on the RIGHT datum plane, but it is not considered planar. Therefore, with the curve edit tool, click on this curve, and then select Planar in the dashboard. Confirm the conversion of this curve from Free to Planar by clicking on Yes.
Next, zoom in on the curve, and make sure that the endpoints are touching the two combined curves. You will see a fixed point once it is connected, as shown at the top of the next page.
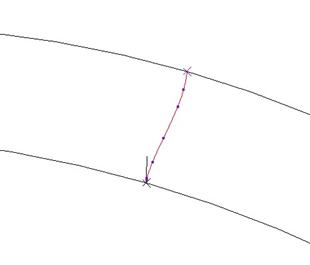
The “X” symbols at the end denote fixed points. We might be tempted (and rightfully so) to make all of the curves that lie on the FRONT datum plane “planar” but, they actually do not sit on the FRONT plane. In fact, as eluded to earlier, the curves don’t all lie on a single planar surface. Therefore, we will not be converting them to planar.
Instead, to finish off this part, we will at least make sure that every curve is connected to each other at the ends, as shown for one side in the following figures.
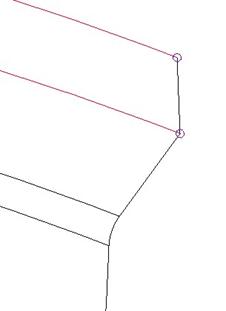

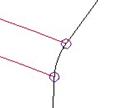

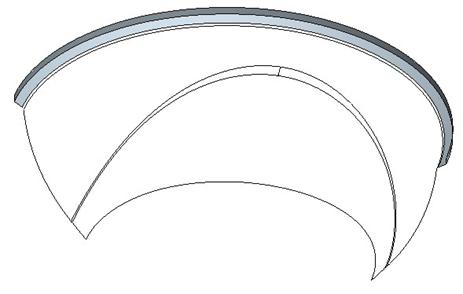
Repeat these similar connections on the other side of the style feature. Once all of the connections have been made, we can begin to create surfaces. We will start at the very top rim, and work down. The next sequence of images depict the different surfaces and (where indicated) the connections between them that we want to impose for this example).

Surface 1 – Default Connections
Surface 2 – Default Connections
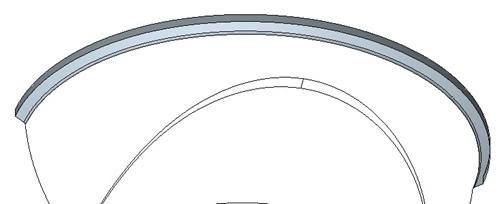
Surface 3 – Default Connections
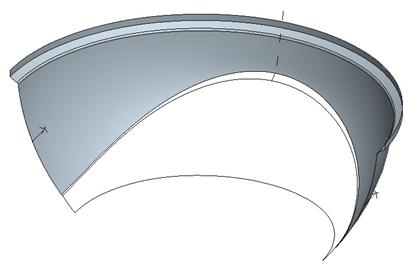
Surface 4 – Matched Connection at middle (not tangent – default)

Surface 5 – Default Connections
For the next surface, we will need to combine the two arced curves shown below to form a single curve. Don’t forget to use the Shift key to connect them first, and then combine them.
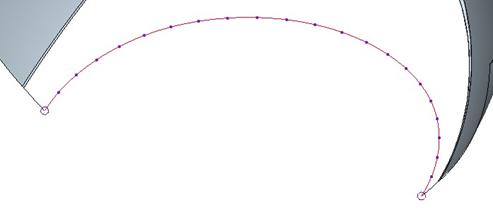
Once combined, create the next surface.

Surface 6 – Matched Connection at middle (not tangent – default)
Now, to create the last two surfaces, we will need to first close up the gap on the mid-plane, by creating a new curve as shown below.
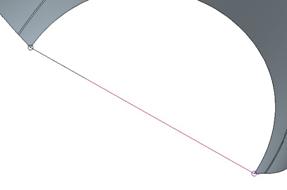
Once you have this curve, edit it, add a midpoint, and split the curve at the midpoint to make two curves. Now, create a third curve that connects at the split on the first curve, and at a length ratio of 0.5 on the arced curve, as shown below.

Finally, create the two surfaces that make up the bottom.
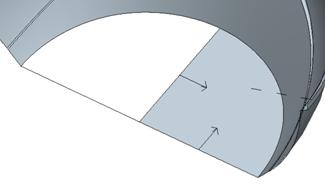
Surface 7 – Triangular Surface 1

Surface 8 – Triangular Surface 2
Click on the blue check mark to complete this style feature, and then unhide the import feature in the model tree to see our surface model on top of the imported curves.

Save and close the model.
LESSON 11 – Surface Operations
Open up the Trim.prt part file. When it comes up it looks like the following.
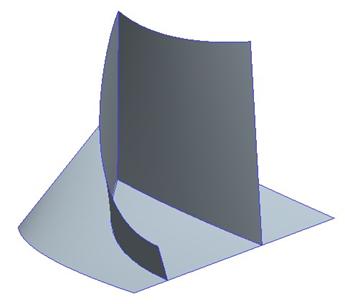
Start by editing the definition for the style feature. Once inside, use the select tool in conjunction with the Ctrl key to pick the bottom surface, and the two COS curves, as shown at the top of the next page.
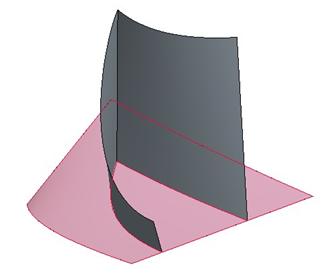
Once all of these three entities are selected, hold down the right mouse button, and select Isolate. This will make all of the other style entities disappear except these three, as shown below.

Now, click on the trim surface tool. Once inside this command, click on the surface first, followed by the middle mouse button.
Next, click on the two curves (using the Ctrl key), and then click on the middle mouse button. Both surface patches should be meshed with a green mesh, as shown below.
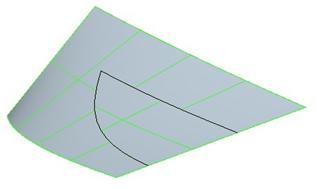
Click on the patch within the two curves so it turns red, as shown below.
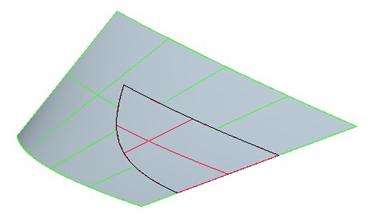
Then, click on the middle mouse button to complete the trim surface command. The surface should be gone, as shown below.
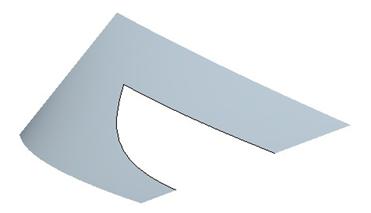
Right mouse click back out in the working window and select Unhide All Entities, and you will see the resulting style feature.

Save and close the part.
LESSON 12 – Working with Sketches
Create a new part called Drill. Once the part is open, start a new style feature. Inside the style feature, select Styling, Trace Sketch from the menu bar.
When the Trace Sketch window appears, click on the front datum plane in the list to insert the new sketch. When the File Open window appears, go to your working directory, and select the Drill_Front_View.jpg file. Once it appears on the model, go to a FRONT view, and adjust the dimensioning bars to cover the total height of the drill, as shown below.

NOTE: If your dimensioning bars are not in the orientation show, select either Horizontal or Vertical until you see them going from the top to the bottom of the part as shown above, then adjust the locations.
Once the locations are at the top and bottom, enter a value of 12.0 in the field, and then press the Fit button.

The sketch will resize and you will need to zoom in. You will notice that the bottom dimensioning bar now sits on the TOP datum plane, and in the Move slider, the vertical distance that existed before is now accounted for. The sketch should look like the figure at the top of the next page.
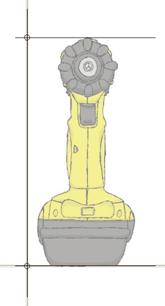
To center this sketch about the RIGHT datum plane, enter a horizontal move distance of -3.2, as shown below.

This will make the drill centered.

Now, click on the Right plane in the top field to assign a new sketch. When the File Open window appears, select the Drill_Side_View.jpg image in the working directory. It will initially come into the part as shown below.
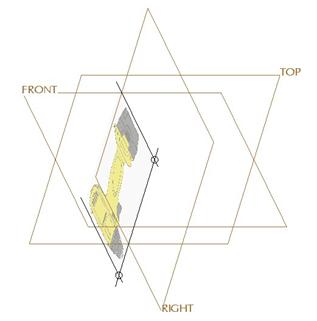
We will start by going to a RIGHT view, and adjusting our bars so they capture the overall height dimension, as shown below.
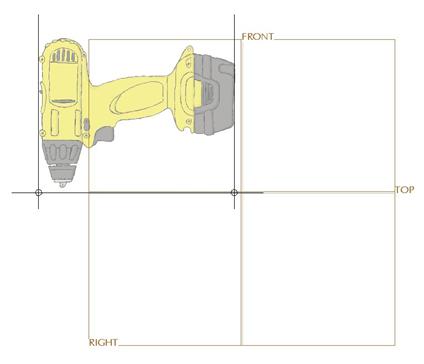
Next, enter a value of 12.0 again to resize this sketch. Once resized, go to a default view and zoom in to see the result.

Now, we need to rotate the sketch -90.0 degrees, and then move it in the vertical direction a value of -6.0, as shown in the following figure of the Properties portion of the window.

The result is shown at the top of the next page.

We can see that this sketch is now in the right spot. Rotate the model to see how both sketches interact with each other.
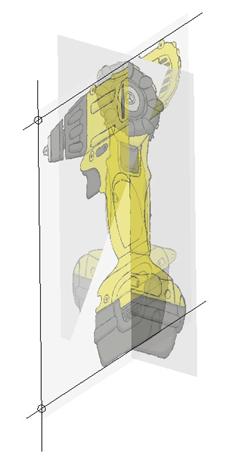
Click on the OK button to complete the trace sketch, followed by the blue check mark to complete the style feature. The resulting model is shown below with the datum planes turned on.
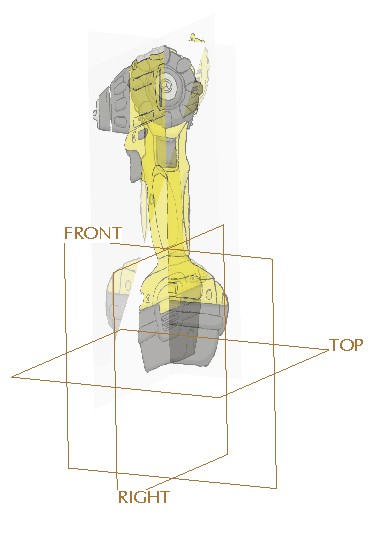
Save and close this model.